

Introduction: In this tutorial, we'll explore how to build a dynamic Bootstrap table in React using the react-data-table-component library. We'll fetch country data from an external API and display it in a paginated, searchable, and selectable table. Additionally, we'll customize the table's appearance and add an export button for data manipulation. Let's dive in!
Step 1: Setting up the Project
Create a new React project using your preferred method
(e.g.,
npx create-react-app ./).Install the necessary dependencies:
react-data-table-component,axios, andbootstrap.
Step 2: Fetching Data and Managing State
javascriptCopy codeimport React, { useEffect, useState } from 'react';
import DataTable from 'react-data-table-component';
import axios from 'axios';

const CountriesTable = () => {
  const [countries, setCountries] = useState([]);
  const [search, setSearch] = useState("");
  const [filteredCountries, setFilteredCountries] = useState([]);

  useEffect(() => {
    const getCountries = async () => {
      try {
        const response = await axios.get('https://restcountries.com/v2/all');
        setCountries(response.data);
        setFilteredCountries(response.data);
      } catch (error) {
        console.log(error);
      }
    };
    getCountries();
  }, []);

  // Rest of the code
}
Step 3: Defining Table Columns and Actions
javascriptCopy codeconst CountriesTable = () => {
// ...
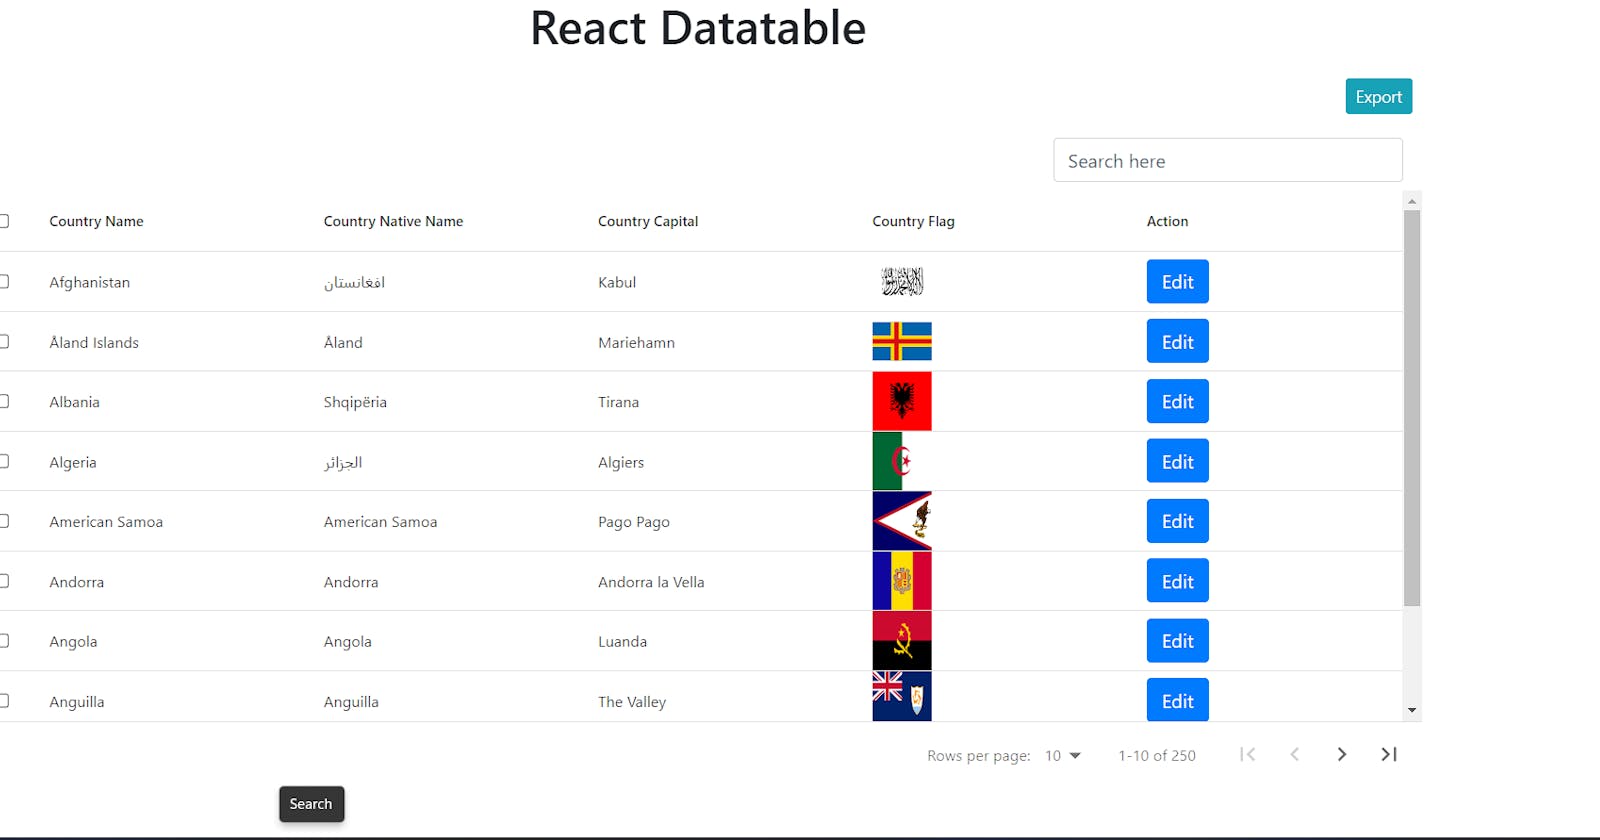
const columns = [
{
name: "Country Name",
selector: (row) => row.name,
sortable: true
},
{
name: "Country Native Name",
selector: (row) => row.nativeName
},
{
name: "Country Capital",
selector: (row) => row.capital
},
{
name: "Country Flag",
selector: (row) => <img src={row.flag} alt={row.name} width={50} height={50} />
},
{
name: "Action",
cell: (row) => (
<button
className='btn btn-primary'
onClick={() => alert(row.alpha2Code)}
>
Edit
</button>
),
},
];
// Rest of the code
}
Step 4: Implementing Search Functionality
javascriptCopy codeconst CountriesTable = () => {
  // ...

  useEffect(() => {
    const filteredData = countries.filter(country => country.name.toLowerCase().includes(search.toLowerCase()));
    setFilteredCountries(filteredData);
  }, [search]);

  // Rest of the code
}
Step 5: Rendering the Bootstrap Table
javascriptCopy codeconst CountriesTable = () => {
  // ...

  return (
    <DataTable
      columns={columns}
      data={filteredCountries}
      pagination
      fixedHeader
      fixedHeaderScrollHeight='450px'
      selectableRows
      selectableRowsHighlight
      highlightOnHover
      actions={<button className='btn btn-sm btn-info'>Export</button>}
      subHeader
      subHeaderComponent={<input type='text' placeholder="Search here" className='w-25 form-control' value={search} onChange={(e) => setSearch(e.target.value)} />}
      subHeaderAlign='right'
    />
  );
}

export default CountriesTable;
Conclusion:
Congratulations! You have successfully created a dynamic Bootstrap table in React using the react-data-table-component library. By leveraging the power of React, you can fetch data, implement search functionality, and customize the table's appearance and behaviour. Feel free to enhance the table further by incorporating additional features or integrating it into your project. Happy coding!